So, here's the history of this room. We live in a big house and we needed such a big house because my mother in law lives with us and she wanted all her living space on the main level. In order to have a living room, bedroom, and bathroom for her on the main level, that meant we were very likely to end up with a lot of house - and we did. We live in a traditional colonial which has a full basement and an addition over the garage. Upstairs in this house were 6 bedrooms. We only needed 4 with one being an office. So, we made what was the master bedroom (the addition over the garage) into a big family room. And the room that is over my mother in law's bedroom (formerly the dining room) was the spare bedroom. What it should have been called was the junk room. Some people have junk drawers. We had a junk room. You'll see that fits when you see the photo.
Now, it was supposed to be a guest room and craft room. We put all the stuff in that room that was leftovers from our previous two homes. My mother in law's spare twin bed, or spare small bookcase, our now not needed buffet table, rolling drawers that had gone from kitchen carts, to my oldest son's toy/art cart, to now live in the craft room. And it housed all these striped fabric bins that used to hold out of season clothes. Literally everything put in that room had no home - but also no reason to get rid of it. It looked OK, but it wasn't overly functional. Here's a couple of shots of before the transformation:


Not too bad for a cobbled together room right? But... how useful is a twin bed for a guest bed? I thought about getting a trundle, but we almost never, ever have overnight guests, so for whom is this room? The guests we get once every 3 years? or us?
As I said, it became a junk room. Too small clothes waiting to be donated? Gets thrown in the room. Spare chairs we are too lazy to carry to the basement? get put in there. Papers we need to organize? Gets put in the room to do until later. Craft things people give me because they know I work with kids, goes in there. Boxes from deliveries - get set aside to get out of the way until we can take them out get forgotten, and then once the storage areas are blocked, things just start piling up. Unless we were having a party, that room pretty much consistently looked like this:

It didn't even have an overhead working light. It was truly junky. Ok, that was the junkiest it ever got, but it was my breaking point. We needed to find a way to make this not a junk room by making it into a usable room.
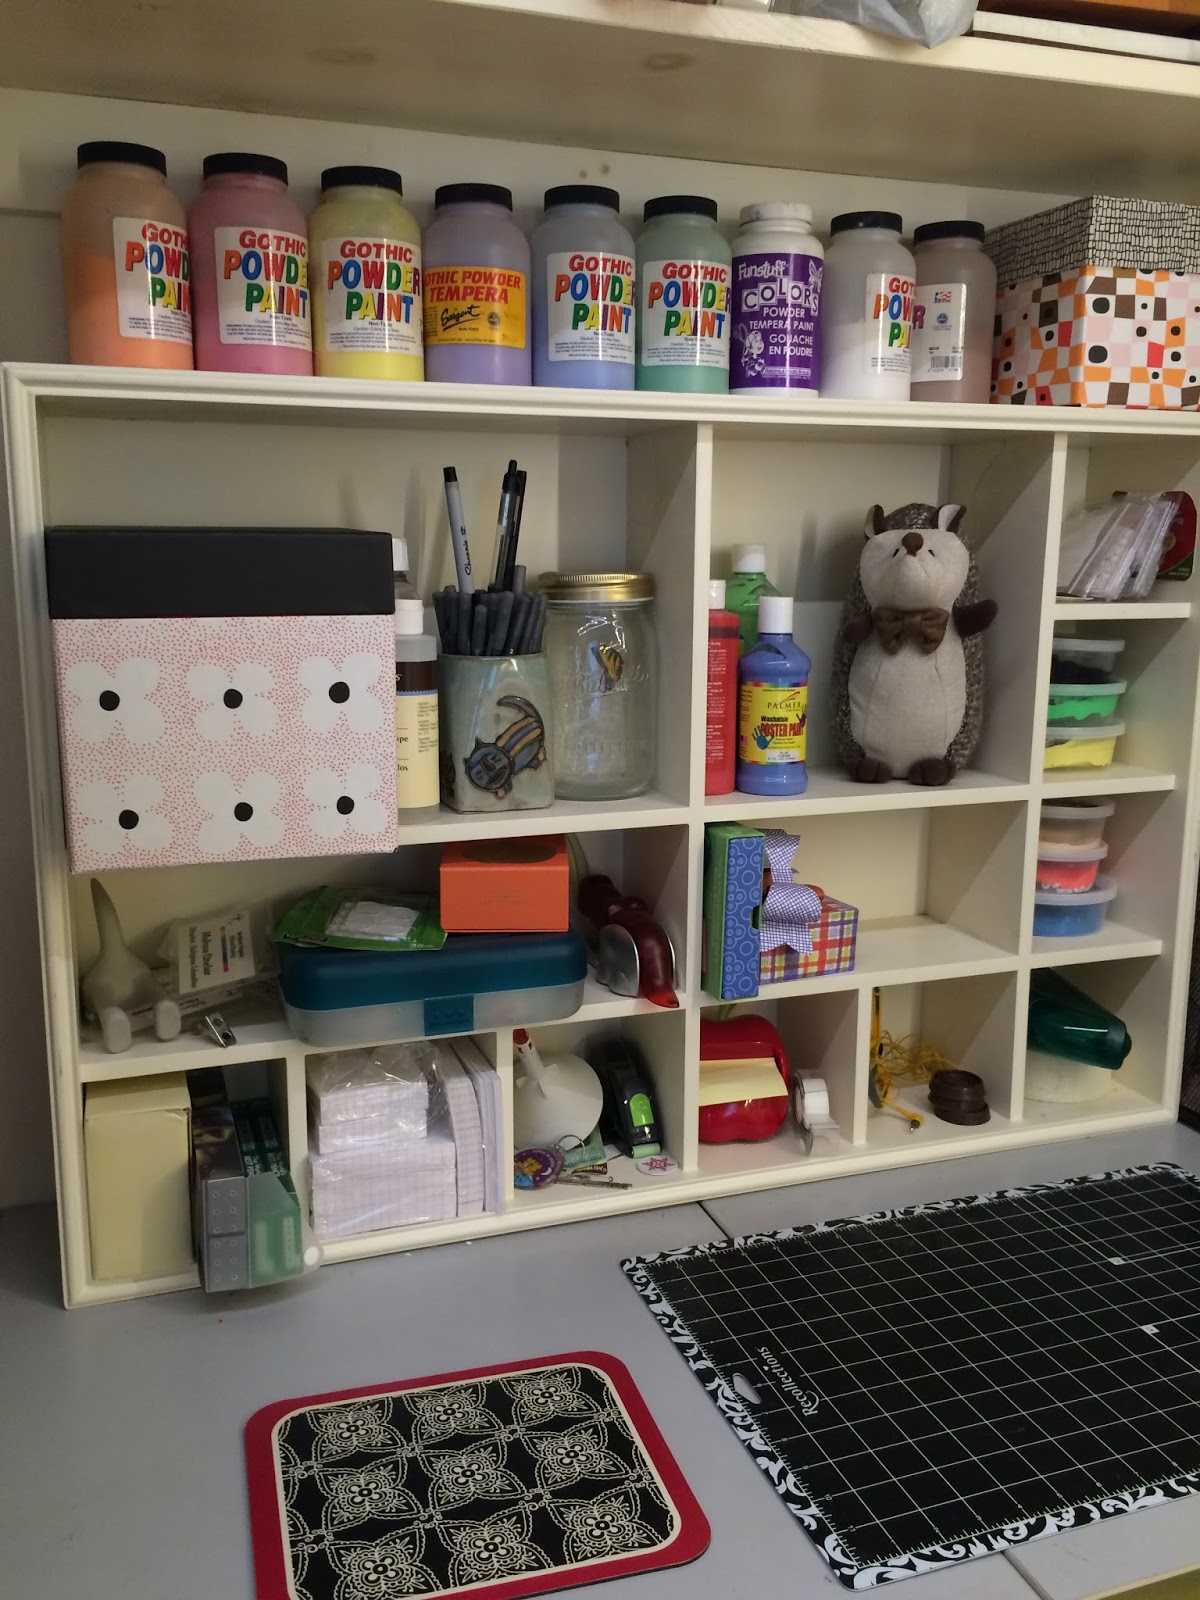
I have that wall of storage in the closet I was mostly satisfied with. But the rest of the room was a bed, a too small bookcase, a buffet table, a big chair no one ever sat in and a writing table and terrible lighting. I needed some storage for all the die cutting stuff I had been given by a retiree. I needed room to have stuff that didn't involve unburying 5 things to get to it.
Initially, I looked at a few secondhand shops, but no matter what I did for looking, it would cost about one grand just in furniture to get the craft room functional. I didn't want to spend a grand on craft furniture - and I would need things to organize it, lighting, etc. Plus, vintage stuff while cool looking, wasn't going to add as much space as I would like. For that, I would need to spend even more money.
For months I looked and then one day I went to IKEA and I saw all these cabinets hugely marked down because they were phasing out the Akurum kitchens to put in the new Sektion kitchens. And then it came to me - starting with these seven display cabinets.

They are 15" wide and about 13" deep and PERFECT for along the wall that is straight in through the door. And they were selling them for $10 a piece!!!! You know what these are, right? These are the display cabinets that IKEA has to show the different door styles. Like this:

I decided to change around all the drawers and then add eclectic fun knobs:


That night I bought just the display cabinets as they were the things that would tie together the old and the new in that room. They were the touch that would make this room feel OK to have IKEA mixed with vintage wood pieces and other eclectic items. AND they were great storage and horizontal space. I played around with my design software and then next morning I went in and got these cabinets and 3 wall cabinets with glass doors (shown later) all of it together for under $500:

Now, these cabinets were not in perfect condition. Internally, structurally, yes. But... there were cosmetic things. Scratches, a big drilled hole in the top corner of the one cabinet, small drill holes in the side of the other, but that was actually perfect for a craft room. And that they didn't have matching handles? WHO CARES? I was going for a miss-mash of styles and having nearly nothing match worked best.
So, I started to piece things together. I had a used Pottery Barn wrapping station to re-use. I had two wall cabinets I had planned to use in the mud room, but they could go here (also as-is purchases from IKEA).

On the opposite wall I hung the wall hanger and placed the cabinets for size. Yep! It was going to work!

I needed a few new things to make it all flow together and be organized, but mostly I re-used things I had from there on out.
Now remember what it used to look like when you stood in the doorway. That was my before. Yikes! Now when you stand in the doorway of that room, it looks like this:

Here's a tour of the room - night and day. The entrance to the room (reusing the sun that used to be the ceiling light, but it stopped working):

The back wall between windows.

Next is the far wall. I couldn't get it on one frame. There is the vintage writing/sewing desk and then the IKEA kitchen cabinets with wall cabinets above (3 with glass fronts and one with wood doors). Organizers abound!


Next is the closet wall - the shelves were there when we moved in. I just removed the closet doors years ago.


And then the wall with the mini cabinets.

And then details of the room:

This here is they only area that is 100% new and even that isn't completely true. The striped bins used to hold socks as our old bedroom set was too small for two people to share. I mixed three different styles of boxes and put them on the IKEA Besta wall frames. The frame can't hold a ton of weight, so things like this are inside each of the bins (all the black bins are currently empty and a few others are too):


Then I wanted to add a wall of picture rails to act as easy to see storage - punches, stamps, and small paints. So, those are new from Ikea too. Flanking them is the wall cabinet I had purchased a year earlier for the mud room but never hung (glitters and glues inside), the pottery barn wrapping station that used to sit on the buffet table, and paper sorters that used to be in my older son's room, but he didn't want them any more. I think it turned out pretty nicely!


Can't forget the hedgehogs - they are all over the room - there are NINE of them hiding about the room!
On the opposite side, the wall cabinets were for books and die cut shapes. One entire cabinet is empty. The others have a lot of space:


A mirror on a rail and more hedgehogs!
The closet side I didn't touch much from before. Though I moved the tall cabinet (that used to house ALL my craft stuff once upon a time and even that was an IKEA as-is purchase about 10 years ago). This also gave me a neat way to tuck away the ironing board. Another as-is find was the alex drawers from IKEA. It now holds LOTS of card making materials and other paper stock.
The rolling carts with plastic fronts were bought for our kitchen for the house we bought in Canada 14 years ago. They've been in constant use somewhere in the house since then. This cubby shelf I bought used the same time I got the PB wrapping station. It needs to be re-organized, but it's functional.


I also added some picture rail for storage above the closet for two reasons - storage, and to hang more LED lighting. The room is FULL of light now with LED tape light under each long picture rail and every cabinet:

The rest of the paper is here. I've had those rolling ikea bins for probably close to 10 years too, but were initially used for toys. Oh, and these trash/recycling bins (there are two in the room) can double as stools:

What else is in the room worth looking at? Oh, yes these things! First is this cart (from ikea bought secondhand). It now houses all the components of the small die cutting machine. The large die cutting machine lives on the buffet table next to it.

And, all my beloved handbags, evening bags, camera bags and work bags will go here on this coat tree that used to be our coat tree in our previous house.

Of this area, currently empty on the left are stacking boxes on wheels (might go to my husband) and 2 stools new from IKEA. These are just great for sitting on for short projects and they take up so little room in the room. Big die cutter on the buffet table.

Oh, and this light! Well, this was a bit of creativity on my part. I had this Pottery Barn Kids mobile with paint brushes that I loved and have had for about a decade. Bought that new at the PB outlet that used to be in Leesburg, VA. However, with all the wall cabinets, it could only go in the center of the room, but I also needed a light there. So, I found a light at IKEA that I could hang above it that would make it look good. I think it's so fun and so completely perfect for the room.

And, behind the door, a magnetic wall to hold all the thin steel dies. I might add something similar on the opposing wall or back of the door for cling rubber stamps, but we'll see! That can wait! It was hard to get this picture, but it's floor to ceiling. Here shows about 50% of the wall.

Now to the vintage wood pieces and why I didn't want to get rid of them. They're cool!!! And multifunctional. This buffet table is half storage, half table. It can extend all across the room if needed.

Here are some shots of it open at different levels. This is halfway open:


Mostly open (one leaf still out):


But it also has two leaves that I store in the closet, easily accessible, that can transform it into this:

So, this room, with the tables expanded is now ready for some meet-up crafting and/or craft parties! Now to make time for that to happen????


Phew! There you go folks! My craft room and all said and done - furniture, furniture delivery. storage bins, lighting, trash cans and stools it came to about $1000. Sounds a lot, but it's a LOT of savings with the as-is items and a few second-hand items in addition to all the repurposed items. Just the new stuff I bought for this room, at full price, would have cost over $4000. I can handle the few nicks and scratches for a 75% savings.
And I'm oh so happy. I finally have my own space. First time since college when I had my dorm room when I was an RA.
No comments:
Post a Comment